Saturday, March 24, 2012

Paint-Dipped Furniture Legs

Building picture mine, Chair picture via

True story: buildings started the whole "dipped legs" craze. Even the dog knows what's going on, and he's blanking the follower chairs who think they're so cool, with their backs to each other, drunkenly hanging off of coat pegs.

Thursday, January 26, 2012

Cinnamon Sugar "Doughnut" Holes

Like a ROCK! Ooohhh, like a rock.

These were supposed to be Scrumptious Cinnamon Breakfast Bites (aka doughnut holes), and I don't know what went wrong, but something did go wrong. The pictures from the original post at Oh My! Sugar High looked appetizing, and I didn't deliberately change anything in the recipe, so I don't know what the issue was. I'm willing to lay the blame on myself, because who knows what happened in this morass of baking failure.

The sacrificial lambs

Ingredients:
1-1/3 cups all-purpose flour
1 cup crisp rice cereal, coarsely crushed
2 tablespoons plus 1/2 cup sugar, divided
3 teaspoons baking powder
1/2 teaspoon salt
1/4 cup butter-flavored shortening
1/2 cup milk
1 teaspoon ground cinnamon
1/4 cup butter, melted

Steps:

Mix the flour, cereal, 2 tblsp sugar, baking powder and salt. It's a lot of flour. I double-checked my measurements a million times to make sure it wasn't supposed to be 1/3 cup flour or something.


Cut in the shortening until the mixture looks like coarse crumbs, then stir in the milk. I bought a pack of shortening just for this recipe, and look what it got me. A bunch of unused shortening sitting in a cabinet and inedible doughnut holes.


Roll dough into 1-inch balls. Mix the cinnamon and sugar in a small bowl and drop each ball first into the melted butter and then into the cinnamon sugar combo. Do not try to be smart and mix the cinnamon and sugar with the butter so that you can skip a dunking step. You will end up feeling very, very stupid, and you'll waste 1/4 cup of butter.

Bad idea, executed poorly.

When it comes time to bake, you have a couple of options to not do. You could pile them all into a greased 8-9 inch pan as in the linked example, or put them on a cookie sheet as the linkee suggested. I went with the cookie sheet, or whatever it is this thing is called, and baked those suckers at 425 F for about 15 minutes


As I might have mentioned, they turned out horrible. The taste consisted of floury flour with a hint of shortening, and the texture was, as also previously mentioned, rock-like. I kept them in the fridge for weeks, feeling guilty and choking one down every few days, before I gave up and threw them out.

Don't do it. Save yourself.

* I made these on Oct. 31 of last year. Don't expect miracles of timely reporting from me.

Wednesday, January 25, 2012

The "Office"

The word "Office" is in quotes because right now it's nothing close to an office, but I do have a plan. Plans, even. And I got G to mostly agree to them, while conveniently ignoring that half of it was his idea to begin with.

Cameras covered in chocolate take horrible pictures of horrible rooms

SO MUCH CLUTTER

I think I used these photos months ago before the previous roommate took his stuff away, but this is a good representation of what it still looked like a week ago, but take away the computer and add a broken guitar to the shelves over the TV. Plus, I've thought a lot about how ugly this room is. I feel the need to write about it some more. The TV stand is huge and cheap, and the couch is broken and not that comfortable, and you can't walk through the door without knocking into it. Forget opening the other door. The other door, that doesn't have a doorknob, by the way. It has duct tape over a hole. And the paint job is terrible. And those shelves above the TV make the already narrow space feel like it's coming out to eat you.

Honestly, it's as if painter's tape didn't exist

At least the last problem has been solved! In a leftover fit of organizing madness from a weekend of decluttering another room, I, wait for it, took down the shelves. It was very impressive. I removed the guitar first (pro-tip: remove things from shelves before taking them down), G unscrewed the highest screws and I took out the rest of those mothers. We still need to yank out these black things that the screws went in, which will apparently cause showers of plaster, so that's waiting until all of the furniture moves into a different room, which it will. At least it's more open now:


Exciting blank walls

I also organized our books. He's not happy about it. I separated his Hesse's.

Yes, I realize using books as a decorating ploy is SO plaaayed, but I've gone through enough practical organization systems in the past (genre then last name, Read vs Going to Read vs Never Going to Touch Again, etc.) that I feel entitled. Look how awesome this is:


Via hola! design and Pinterest

So I did this:


Not sure about the red shoeboxes, and I need to figure out something to put on the empty top shelf now that I took down the, ahem, CD tower from the 90's, but I still know where everything is if I need a book and it looks vastly improved already. Especially considering that if I had gotten lazy and quit halfway through the process, the room would look like this, with a bonus dead body because G would have killed me:

Yes, I started organizing CD's by color on the lowest shelf.


Sorting. Not quite there, but at least books are on shelves?

I did all of that on a weekend when he was at work. It's hard to describe the franticness that sets in when you realize a room looks like the above picture and you only have an hour to put everything back or in a closet before your boyfriend comes home and starts asking questions, but it's weirdly exhilarating. COMPETITIVE SPEED BOOK ORGANIZING.

I'm not going to lie, I went to the Strand and bought a few $1 books with brightly colored spines to augment the shelves, but I made sure they were books I also would want to read (Vonnegut, The First Word: The Search for the Origins of Language, and three or four other interesting unheard-of books). Mmm, books. I'm finishing up with The First Word and it's pretty fascinating.

The Current To Do List:
Rip out the screw-holes and spackle over them
Fresh white paint (including the wooden shelves, and ideally the door and closet door that aren't pictured, but that's not happening)
Install a doorknob to replace the duct tape, chic as it is
Bust out a white lacquered Parsons desk, but a homemade version because that's a lot of money for five rectangles of wood
Move the bookcase from the second bedroom, AKA FutureDen, to where the couch is, ideally painted as well because it is old and unattractive
Desk lamp
Figure out laptop storage
Art (I have a big, super-colorful, stylized portrait of myself that's sitting in storage in FL, but that feels strange, to have a portrait of yourself in your office. But it's stylized! And by a legitimate artist!)
A chair would be nice

My dream, if I had a larger space and I'm guessing thousands of dollars to spend on that chair, that table, and those bookshelves:


There's no great source for this picture, but it's Isabel Lopez Quesada's work. Via here and Pinterest

It was G's idea a while back to turn this room into a home office, but I couldn't bear the thought of having a room in my home dedicated to work. I leave work every day for a reason, you know? That reason is that I'm done working. But a place to put my laptop aside from "on my lap on the couch" would be cool. Nothing specifically work-y will go in here, though. No rolly desk chair. No task lamp. No obvious desk-desk, hence the Parsons table. In my head, I've already made all the changes and painted and everything, and it's slightly disconcerting to walk in and see the couch and TV stand and stuff everywhere.

Oh well, time heals all impatient redecorators. Or something like that.

Next up: FutureDen, and my attempts at making mood boards and floor plans.

Sunday, January 8, 2012

Chewy Brownie Cookies

Chewy Brownie Cookies

I like drinking Godiva liquor with mint ice cream over the rocks. It's like the Grasshopper's younger, eager cousin, who wants to please you, but doesn't have the right tools handy. Like a blender. One night G was making me this drink, and he secretly put in a tiny amount of whiskey, thinking he could acclimate me over time to stronger drinks. I took a sip and immediately made a face. "Did you put something else in this?"

He was stunned. "I put in the smallest amount possible of whiskey. I can't believe you noticed that."*

"I have a very sensitive palette."

Notice I didn't say mature, refined, or adventurous. Just sensitive. I can't handle spicy foods, because I notice even the smallest amount, and a "dash" of black pepper has been known to ruin steak for me. All of this is a roundabout way of saying that I'm never baking with shortening again. This is the second recipe I tried with it, and I was on the fence after the first disaster. That had a lot of other things going wrong, though, and I bought all this stupid shortening, and a commenter on this new recipe who had tried it both ways, butter and shortening, said there was no taste difference, just a better appearance with shortening. So I stayed true to the original recipe, used shortening, and ended up with brownie cookies that tasted off to me and my sensitive tongue.

I'm not too disappointed, since I didn't spend a lot of time on these, and G liked them, but I do want to try these again with butter. They're so close to being really good, and I'll gladly sacrifice appearance for taste, especially since my cell phone camera can't tell the difference anyway. All I want for Christmas/Hanukkah/New Year's/my birthday is a real camera. And photography lessons. And black paint for the second bedroom. And a new kitchen floor. And new kitchen counters. I'll move on now.
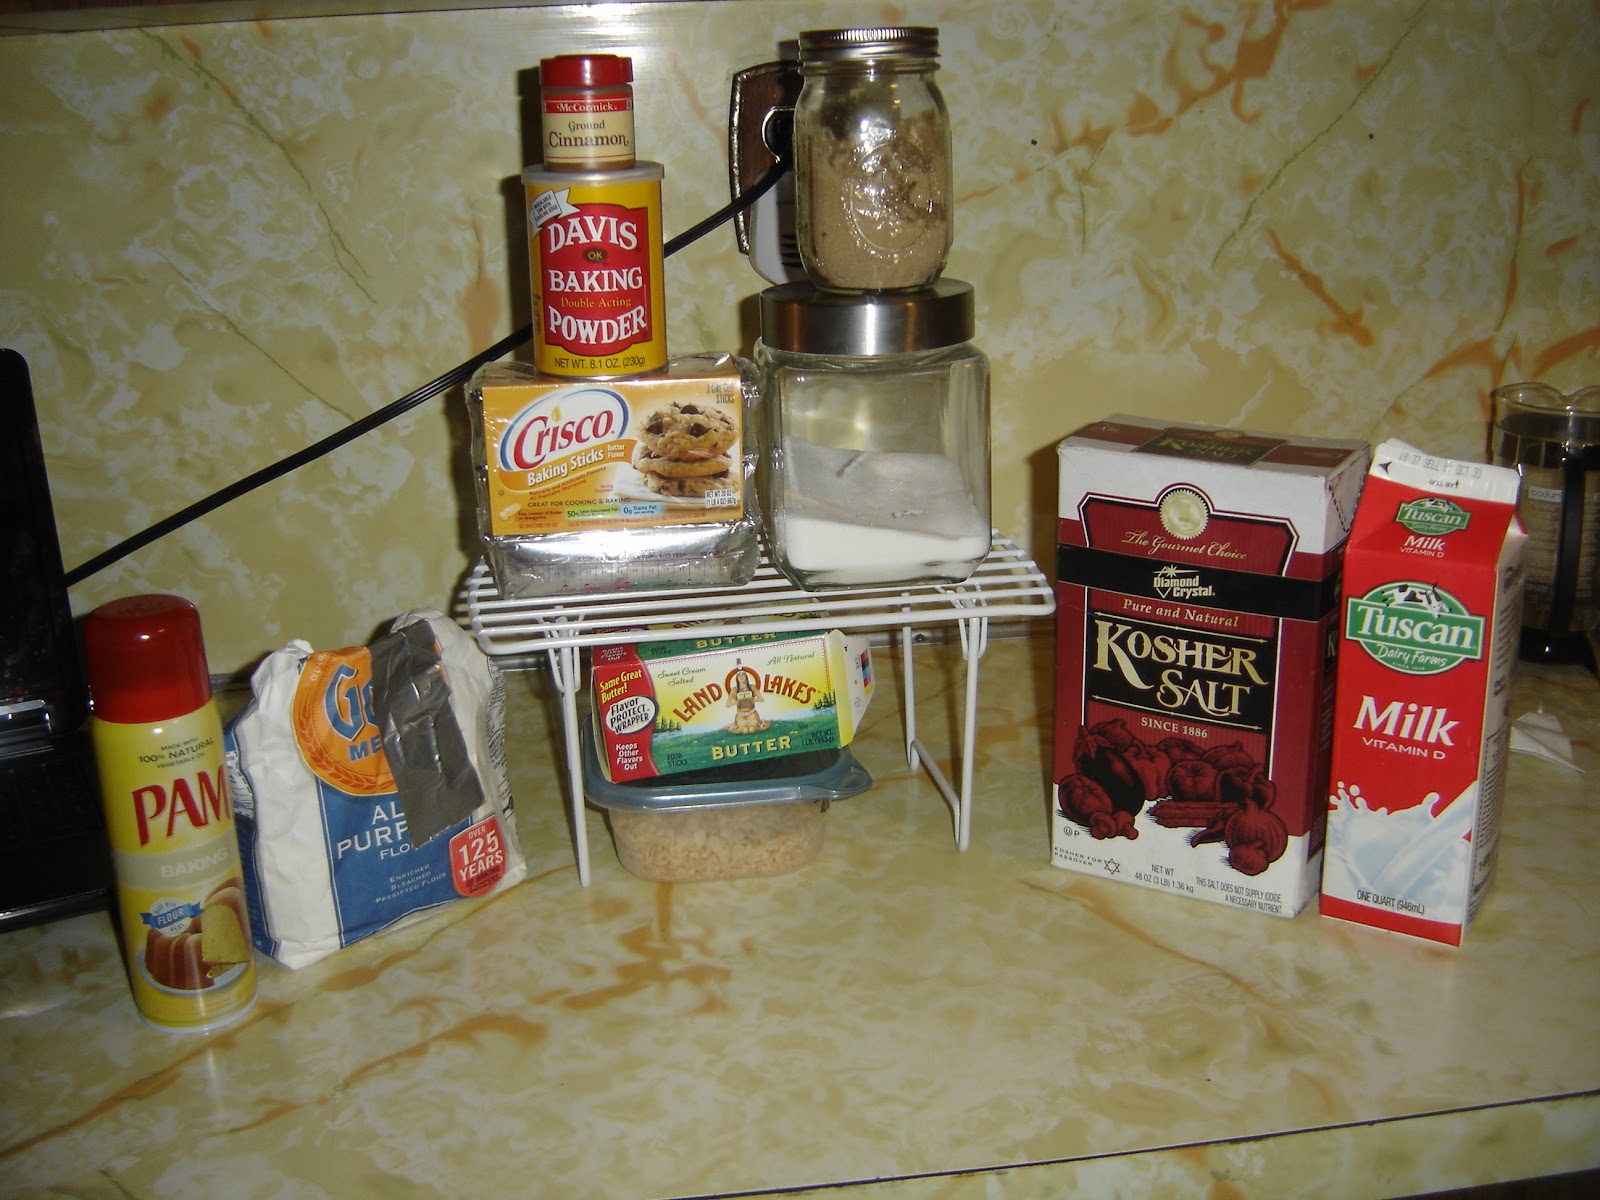
The Ingredients:
2/3 cup shortening (I'll be trying out butter the next go-round)
1 1/2 cups packed brown sugar
1 tablespoon water (not needed if using butter)
1 tablespoon vanilla extract
2 eggs
1 1/2 cups all-purpose flour
1/3 cup baking cocoa
1/2 teaspoon salt
1/4 teaspoon baking soda
2 cups semisweet chocolate chips (I used about 1/2 cup of semisweet Godiva and 1 1/2 cup of milk chocolate Hershey's)
1/2 cup chopped walnuts or pecans (I left these out)

The Process, Illustrated:

1) Leave out the shortening/butter and eggs for a while so they come to room temp, and then preheat the oven to 375 F.

2) Cream the shortening, sugar, water and vanilla (or the butter and vanilla) in a big mixing bowl. I didn't want to bother cleaning my hand mixer after this was over, so I did this all with a wooden spoon. The shortening was soft, but my arm still got a workout.

Proof 

3) Beat the eggs into the mixture.

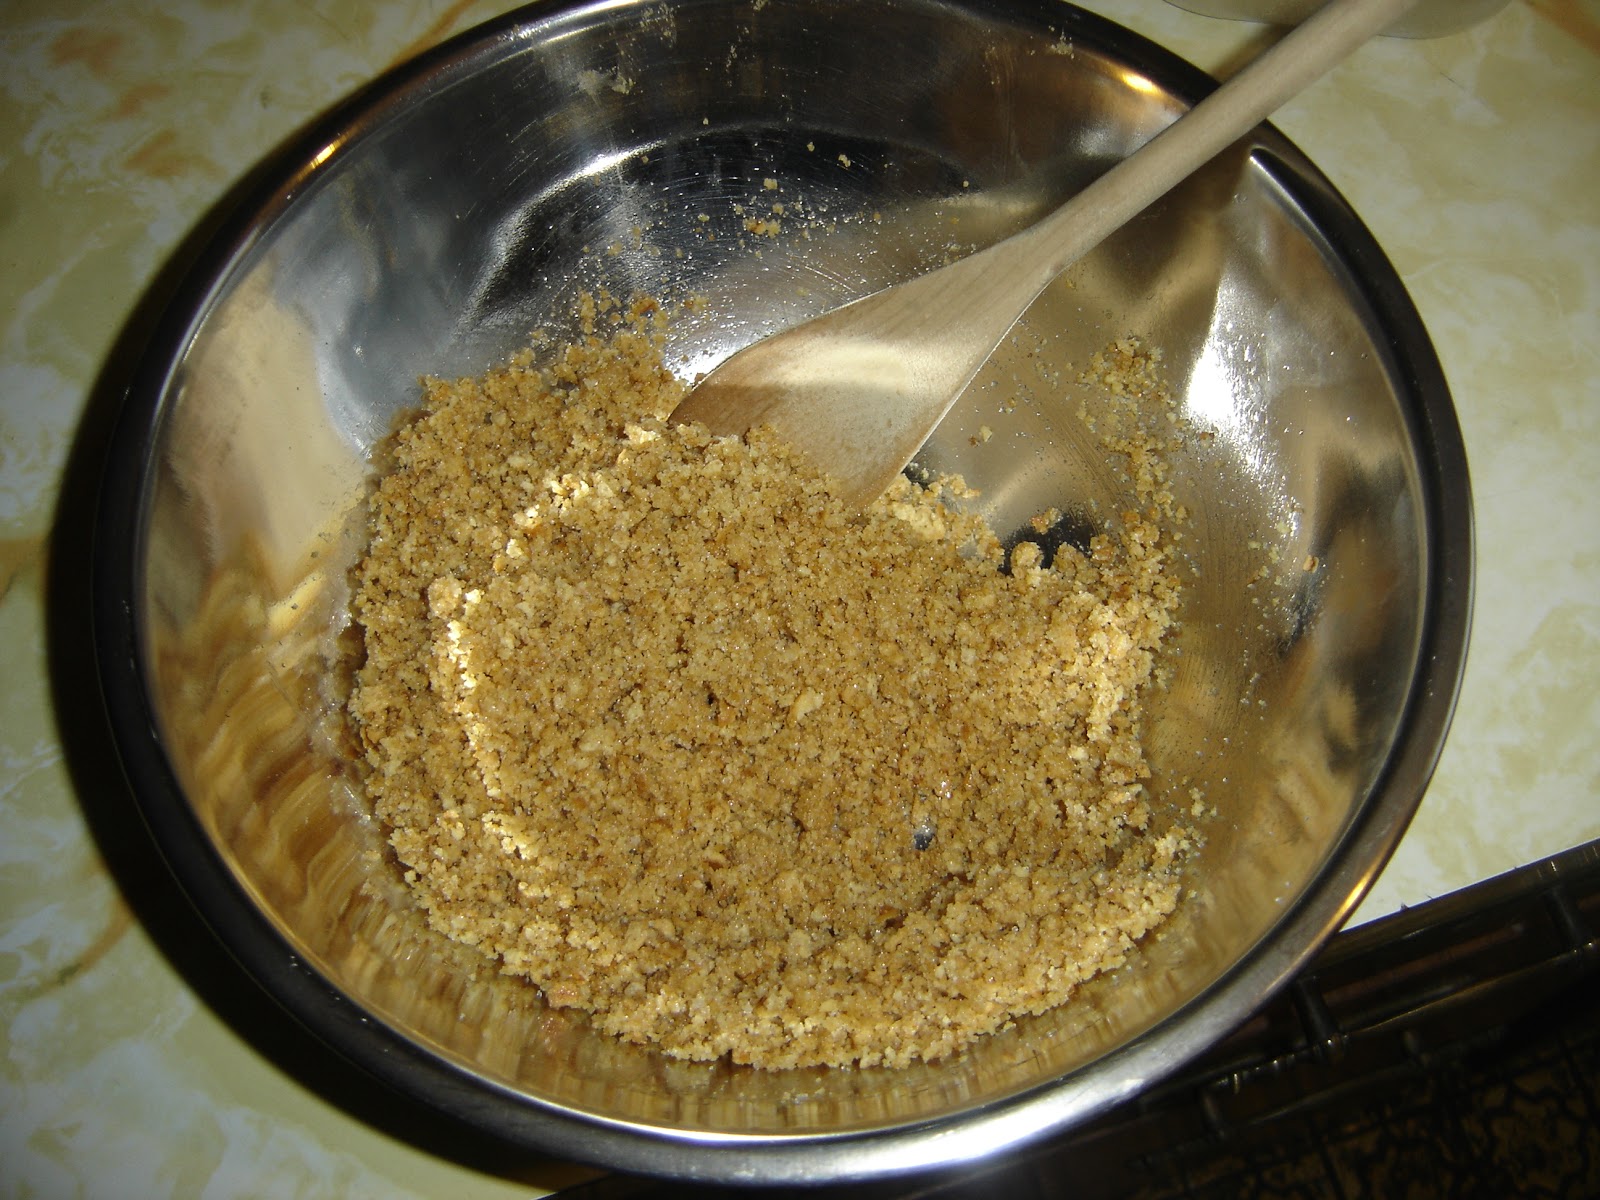
4) In a separate bowl, stir together the flour, cocoa, salt, and baking soda. I like to mix the cocoa with the salt and baking soda first, so you can tell by the color that everything's evenly mixed, and then mix in the flour. Otherwise you may end up under-mixing the salt and baking soda since they'll get lost in the flour (goes my line of thought). But I'm obsessive.

5) Little by little, add the dry ingredients into the wet mixture. Beat (or stir vigorously) until blended. Don't over-blend. (Does it annoy anyone else when you see recipe instructions like "Don't over-bake"? Who's out there deliberately over-baking their cookies? Maybe if I had a transparent oven door that would be easier to control. Or if I knew how much time resulted in over-baking. Or maybe if you TOLD me the right amount of baking time.)

6) Stir the chocolate chips into the mixture, and if you're using nuts, now's the time.

Chip chip cheerio

7) The original recipe says to "drop by rounded teaspoonfuls 2 in. apart on ungreased baking sheets." I probably followed that in general, but I was using a regular spoon to scoop so I don't know the exact size. I made 22 cookies, and the recipe says it would make 18. Take from that what you will. I also used parchment paper, because I loathe doing the dishes. Putting away dishes, though? I'm a champ.

Batch numero uno

8) Bake at 375 F for 7-9 minutes. Don't over-bake. Let them cool on the sheet for a couple of minutes, then move them onto a wire rack to cool completely.

Can you tell which cookie I toothpick tested? I'm a pro.

Short version

Ingredients:
2/3 cup shortening
1 1/2 cups packed brown sugar
1 tablespoon water (not needed if using butter in place of shortening)
1 tablespoon vanilla extract
2 eggs
1 1/2 cups all-purpose flour
1/3 cup baking cocoa
1/2 teaspoon salt
1/4 teaspoon baking soda
2 cups semisweet chocolate chips
1/2 cup chopped walnuts or pecans (optional)

1) Leave out the shortening/butter and eggs for a while so they come to room temp, and then preheat the oven to 375 F.
2) Cream the shortening, sugar, water and vanilla (or the butter and vanilla) in a big mixing bowl.
3) Beat the eggs into the mixture.
4) In a separate bowl, stir together the flour, cocoa, salt, and baking soda.
5) Little by little, add the dry ingredients into the wet mixture. Beat (or stir vigorously) until blended. Don't over-blend.
6) Stir the chocolate chips into the mixture, and if you're using nuts, now's the time.
7) Scoop onto a cookie sheet, either ungreased or with parchment paper.
8) Bake at 375 F for 7-9 minutes. Let them cool on the sheet for a couple of minutes, then move them onto a wire rack to cool completely.

*Really. He still brings this up, months later.

Friday, December 30, 2011

So this is Christmas


What I'm thankful for: I used a power tool, and I'm still standing. What, is it not Thanksgiving anymore? G and I went to his parents' for Christmas, and they're in the process of redoing their basement, labor and tools courtesy of their son-in-law, A, who works in construction. And me, who helped paint radiator covers and screw in screws with an electric screw thing, but I'm going to be humble about my amazingly important contributions. A had a bunch of loud things with scary blades in his car, and I overrode everyone's objections and used his chop saw to be BADASS. I put on my finest Christmas coat (it's Belarussian, no joke), made sure I was standing in front of a red car and green trees, dumped the chop saw on top of his table saw, and started slicing up pieces of wood. I only lost control twice! Apparently I "messed up the right way," because when something started going wrong, I let go of the saw trigger. I also stuck my hand under the blade while it was still spinning to grab a piece of wood, so there's that. And I had claw hands the next day. Within a month, though, I'm going to be a pro.


There are no pictures of my attempt later that night to chop firewood with an ax. It's a good thing G taught me to have a wide stance in case I overshot it, because I definitely overshot it and swung an ax through my legs. I was put on precision stump chopping drills after that, but my second real attempt hit my foot. I was then sent back into the house, but I still felt outdoorsy so it's all good.

My mother's response to these photos: "I see it, but don't believe it."

Also, I'm making a Dalek Christmas tree with a fake tree and clearance ornaments! Maybe tomorrow I'll find that mythical string with which to attach the wire whisks.

Saturday, October 22, 2011

Cream Cheese Chocolate Cupcakes

"Not your best work." - G


I got home at 10 PM a couple of nights ago, and decided I wanted to make dessert. I didn't have enough ingredients for anything besides cocoa-flavored powdered sugar, so I walked over to the grocery store and picked up eggs, cream, even peanut butter baking chips. The one ingredients I ended up not having enough of? Chocolate chips. Chocolate is the one constant in almost every dessert I like. Never again will I dismiss the importance of buying a fresh bag of chocolate chips.

Temple of Doom Cupcakes

I decided on this recipe for cream cheese chocolate chip cupcakes, because I thought forgoing frosting would make it both easier to make and easier to take to work. I halved it, because who wants 18 cupcakes lying around if it's only going to be two people eating them? Tip: when a recipe calls for ingredients like 1 egg, or 1/8 tsp salt, or 1/3 cup sugar, you better make sure you have the ability to measure half of those things before starting. I did not. The results? Kind of terrible. Edible, but barely. Neither of us even wanted to lick the bowl. They look cool, though, so I took pictures!

It's like a peanut butter rockslide/sinkhole.

The ingredients, halved:

Filling
4 oz. cream cheese
1/6 cup sugar
1/2 egg
1/16 tsp salt
1/2 cup chocolate chips (I only had 1/4)
1/2 cup peanut butter chips

Cupcake batter
1/2 cup sugar
1/8 cup cocoa
1/2 tsp baking soda
1/4 tsp salt
1/2 cup water
1/6 cup vegetable oil
1/2 tbsp vinegar (the original recipe calls for white vinegar, and I only had apple cider vinegar - not sure what the difference is)
1/2 tsp vanilla extract
3/4 cup all-purpose flour

The culprits

1) For the filling: Beat the cream cheese. Be annoyed that you need to get 4 oz. from a partially-empty 12 oz. tub of cream cheese without a kitchen scale.
2) Add the sugar, egg, and salt. Mix well. (I used a mixer for this part.) Be annoyed again that all of these ingredients pose measuring issues. Out of over 10 measuring cups and spoons, you have only a 2/3 cup measure, and no 1/3 cup measure. Each of my cups has a halfway marker, so I would've been able to measure 1/6 of a cup of sugar easily from a 1/3 cup. Instead I roughly converted to tablespoons. And 1/16 tsp of salt? Also not available. Half an egg? That was approximate, to say the least.

Eggs, sugar, and cream cheese...
turn into eggy, sugary cream cheese.

3) Fold in the chips. Kick yourself for not getting a bag of chocolate chips, even after considering it at the store.
My insufficient amount of chocolate chips...

plus peanut butter chips...

turn into this.

4) Combine flour, sugar, cocoa powder, baking soda, and salt. Mix it up with a spoon. I'm still using up the cocoa powder that was left behind by J, the old roommate, and I should have sifted it first. I ended up with very small clumps that couldn't be completely exterminated after mixing.

Cocoa powder bra

5) Add in water, oil, vinegar, and vanilla. Watch it bubble.

Ahh, the smell of vinegar reacting with oil. Wear a mask next time.

6) Mix well. The original instructions don't specify if this step needs an electric mixer, but I used a wooden spoon.


7) Fill 9 muffin cups halfway with the batter, then top with the cream cheese filling. The recipe says to add 2 tbsp, if you want to be exact. I just underestimated, and dumped some more in all of them at the end so they looked even,

The artistic process is quite delicate...

and requires constant editing.

8) Bake at 350ยบ for 25-30 minutes. Cool 10 minutes and remove from pan. Do NOT make my mistake and test them by sliding a toothpick into the middle to see if anything sticks. The filling takes much longer to bake, so by the time the toothpick came out clean from it, the cupcakes had been in the oven for almost 40 minutes, and the outside batter was dry and unappealing.

The filling gets all splattery.

It's pretty cool, even if it doesn't taste good.

The Leaning Tower of Cupcake

If I tried to make these again, I would make the following changes:
1) not halve the recipe, which make everything more complicated than it needed to be
2) measure everything before starting, which I should do every time I bake
3) measure what I think I have before going to the grocery store, again, which I should do any time I bake
4) sift the cocoa powder, as mentioned previously
5) use a wetter cupcake recipe, so there will be less of a disconnect in baking times between the filling and the cupcake
6) soften the chips before folding them into the cream cheese
7) go all chocolate with the chips, instead of using some peanut butter chips

Basically, I would only use part of the filling recipe, and throw out the cupcake batter part completely. I'm finding that cupcake recipes with vinegar aren't my favorite. I found another version of these from a comment on the original post that talked about making black-bottom cupcakes, and that post had much more detail about what the process should be at each step. I might use that as a guide.

Farewell, poorly-cooked cupcakes.

Wednesday, October 19, 2011

Mini S'mores Pies

"Oh yeah, that's like a chocolate bomb. That's gonna be good." - G

They were. And I made it up myself! Look at me, experimenting. I used bits of other recipes, and it was born out of a desire to use up my stores of marshmallows and graham crackers, but I'm still proud of myself.

Mini S'mores Pie

To make the crust, I halved this recipe, and to make the chocolate, I went back to the S'mores truffle recipe and three-quartered it (instructions below are already halved and three-quartered):

Mini S'mores Pies (makes 7-9)

Crust:
3/4 cup finely ground cinnamon graham cracker crumbs (or use regular graham crackers and add some cinnamon) (or be lazy and use a pre-made crust, who am I, the pie crust Nazi?)
2 tablespoons and 2 teaspoons white sugar
3 tablespoons butter, melted


Filling:

1 1/2 tablespoons unsalted butter
1/3 cup heavy cream, approx.
1 1/2 cups milk chocolate chips (9 oz.) I've made these with milk and dark chocolate. Go with whatever you have or prefer, they'll be delicious either way.
40 mini marshmallows, approx.
About 2 graham crackers, some finely crushed, and some broken in medium-sized bits

1) Mix graham cracker crumbs, sugar, and melted butter until well blended. The mixture will be crumbly and it will seem like you haven't used enough butter or anything sticky, but it'll work out. I used a wooden spoon, and that was sufficient.

Mixed to the max

2) Press mixture into 7-9 muffin tin spaces. Only make 7 if you want a thicker or higher crust. I made 9, but the sides weren't thick enough and burnt a little bit. If you go with 7, you won't need as much chocolate.

3) Bake at 375 degrees F (190 degrees C) for 7 minutes. Let cool.

Chillin.

4) Melt butter in a small or medium saucepan, then whisk in the cream and bring it to a boil.

5) Place the chocolate chips in a bowl and pour the boiling butter-cream over it. Stir until all of the chocolate's melted and smooth. If there are still lumps, place the bowl over a pot of water on a low boil and stir until they're gone.

6) While the mixture is still liquidy, pour a thin layer into the graham cracker crusts, still in the muffin tin.

7) Place four or five mini marshmallows in the chocolate, and pour a thicker layer of chocolate over them so the marshmallows are covered.

Progress, from left to right.

8) Sprinkle some graham cracker crumbs over the pies and stick some larger bits on top in a charmingly haphazard fashion.

Crumb explosion in aisle 1!

9) To set the chocolate, stick in either the fridge or the freezer for at least an hour. They keep well, travel well, and taste delicious cold. In my opinion, the marshmallows taste much better right after being in the cold. They get more substantial, in a way.


I still have s'mores materials left over, so my next move is a S'mores candy bar. I need a chocolate thermometer to figure out tempering, but that's gotta be easy... If I make these mini pies again, and I will, as G has already dumped the Cinnamon S'mores Truffle in favor of these, I would use more marshmallows. I want the cross-section to show almost a complete marshmallow layer. I also want to try baking it, so that the marshmallows will melt.

Mmmm. Pies.

So delicious.